5 Simple Steps to a DIY Professional Headshot

It’s been talked about before, but we’re going to take a refresher on one of the most important components of your personal and professional branding: The dreaded professional headshot.
I’m sure we can all agree that most of us don’t like taking pictures of ourselves unless they include our favorite destination, are shot with our favorite people, or contain some other significant thing that takes the focus off ourselves. But this one photo is one of the most important things we can add to our personal-branding arsenal.
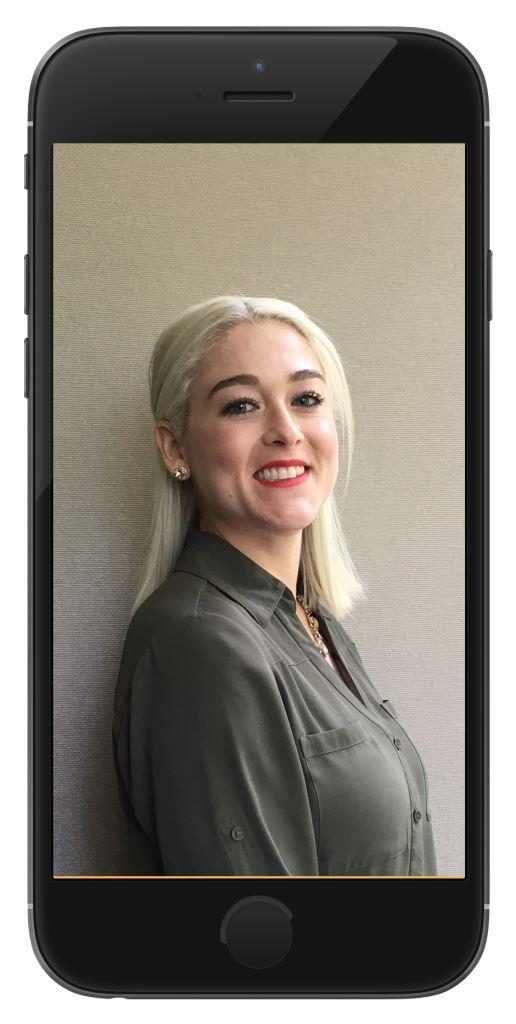
Beyond first impressions and allowing others to gauge how seriously you take your online presence, your professional headshot is one of the best and most telling ways to present yourself to the world, and it should accurately reflect the image you’re trying to portray.
In a time when technology is at everyone’s fingertips, there’s no excuse to not have a professional-looking headshot – even if you’re not ready to invest in a professional photographer, although that’s the preferred choice if you’re able to go that route. With the proliferation of high-quality phone cameras, techy photo-editing apps, and a few tips to get the right shot in the right light, you can create a professional-looking headshot in less than five minutes. I’ll tell you how to do it.
1. Polish yourself.
You want to look your best, but you also want to look like you didn’t come from a 90s-era Glamour Shot photoshoot. Consider solid-color clothing without patterns, which are busy and distract from your face. Dress for your role, but don’t be too stuffy. When considering tops, the most flattering are dark-colored, which put the attention on your face and eyes. For ladies, hair should be neat and makeup should be natural-looking. Avoid big jewelry, but keep true to your own style.
I took my most recent photo after work one day, because I find the idea of getting ready for a “photoshoot” the most daunting part. So, strike while the opportunity is hot (or convenient).
2. Find your location, find the light.
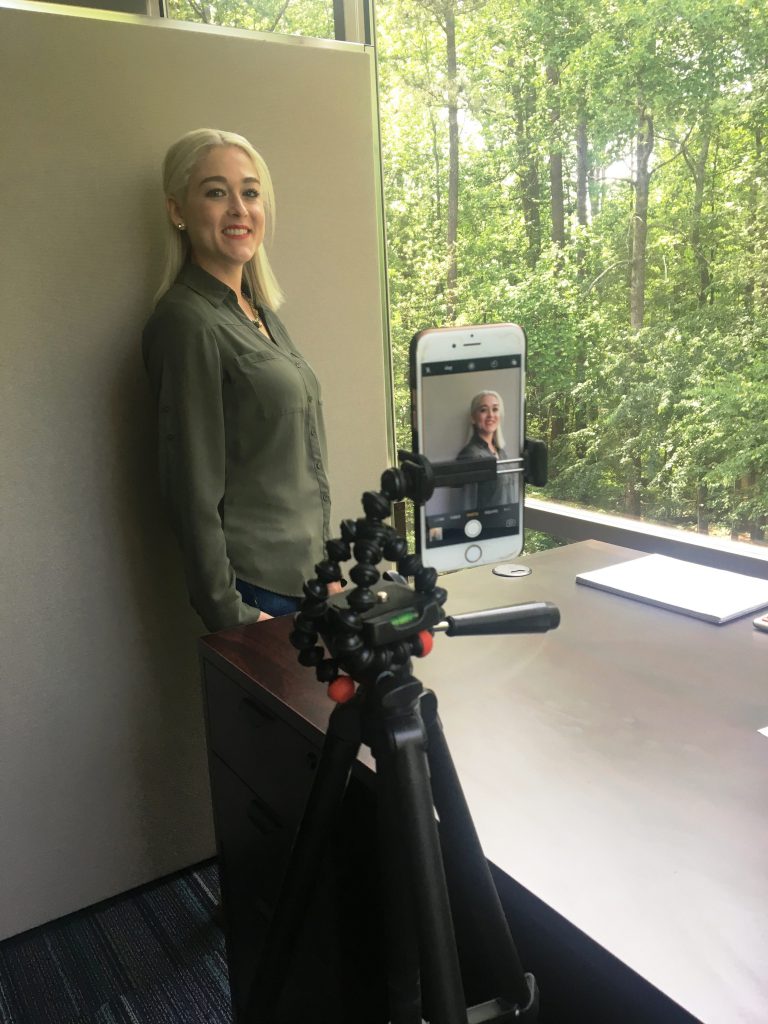
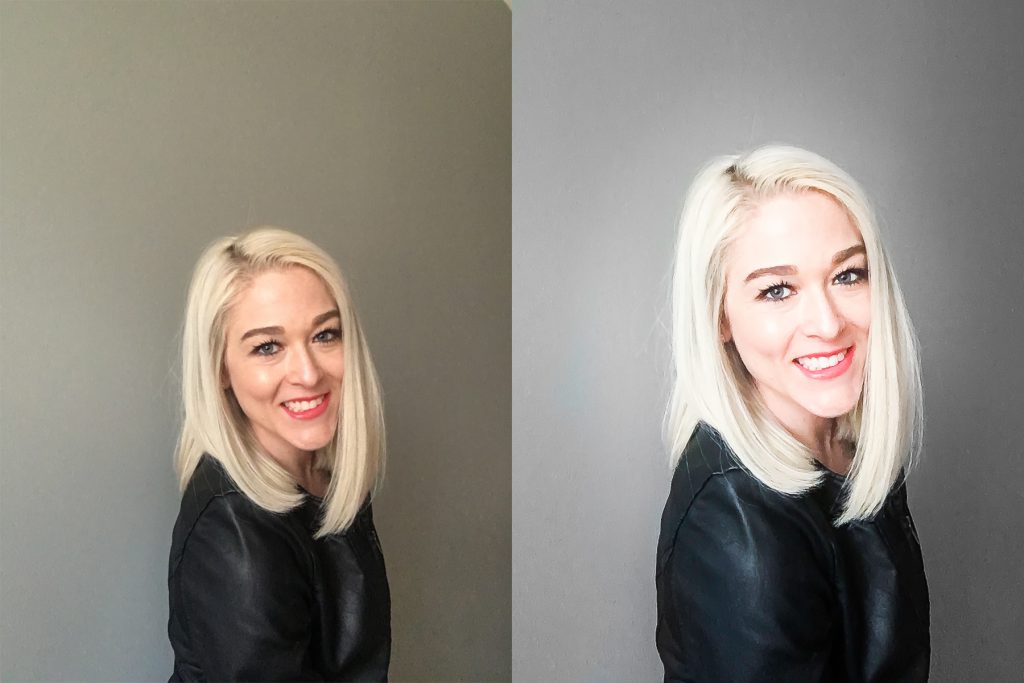
Find a solid background that’s clutter-free. This could be a solid-colored wall in your home or office. I chose a gray office paint for this particular reason – the photographer in me always wanted a neutral gray wall in the house to take photos, and it has definitely come in handy. If taking the photo indoors, set yourself up next to a window and turn off any lights in the room. Pick a time of day where non-directional light pours into the room (or use a north- or south-facing room).
If you’re outside, choose shade, stay away from direct sunlight or spotty light, and find a place with a simple background. Remember to disable any flash on the camera/phone, and no matter what, always use 100 percent natural light from the good outdoors – this is what really polishes the photo and makes your headshot appear more professional.
3. Use your camera on a self-timer, or grab your spouse/best friend/neighbor/anyone to take the photo.
Practice using your self-timer, and set up the phone using a piece of furniture or an inexpensive mini-phone stand. Ensure the camera is eye-level and steady. A benefit of using your self-timer means that you can take as long as you want to get the perfect professional headshot, you don’t have any onlookers who might make you feel uncomfortable in front of the camera (most of us can be camera-shy, right?), and you’re more likely to experiment. But if you’d rather have someone help, instruct them to keep the camera eye-level and take many shots.
And trust me when I say this: Under no circumstances should you ever consider taking a selfie, even if you think it still looks “legit.”

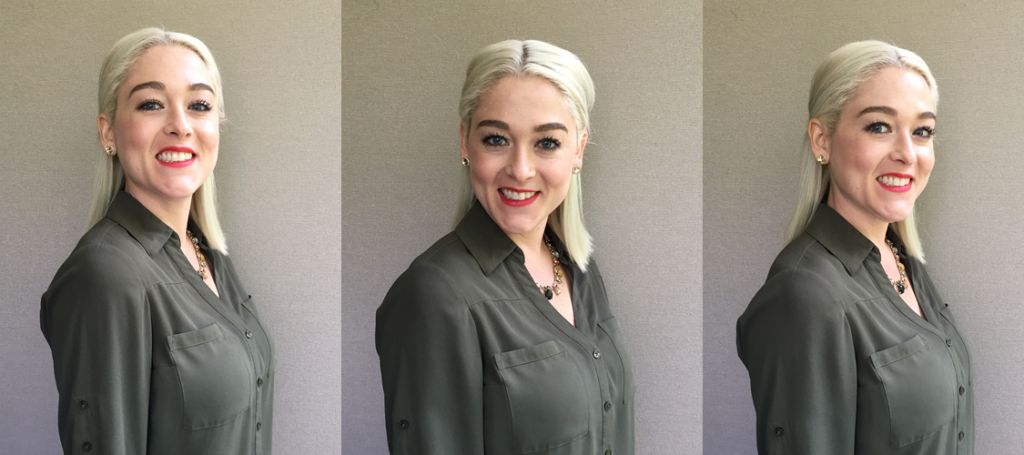
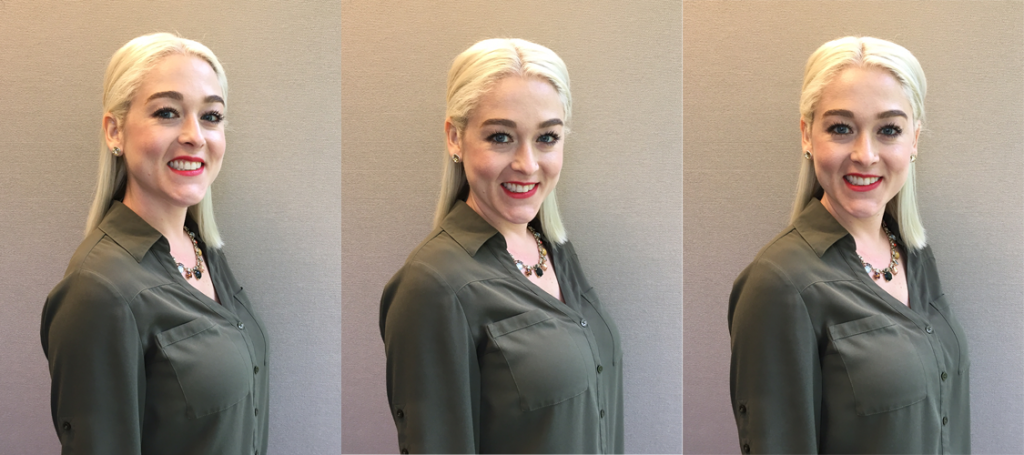
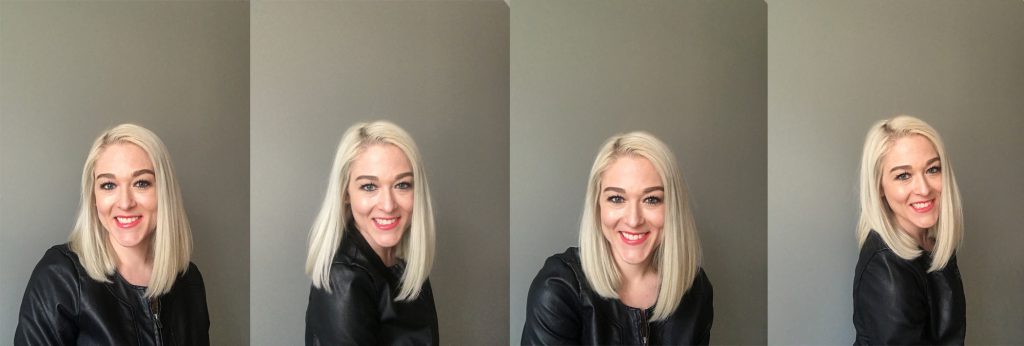
4. Pose differently, smile and try different clothing options.
Have a couple of things on hand to change into so you can quickly switch up your look. Smile, look into the lens/camera to create a connection, and change up your posing so you have different headshots to choose from. Consider taking some with your head and shoulders in the frame, as well as some with your head down to your waist. Stand at an angle for some, and get a square-on shot for others. The more you experiment, the better your chances of getting a professional-looking headshot you’re really happy with.
5. Edit, export and update those channels and files!
How you edit your photo is nearly as important as how you take it. Some of the essential edits to make are to ensure it’s bright enough, that the contrast is right, and the sharpness makes your headshot look crisp on a digital screen. My favorite on-the-go photo editing app is Afterlight because it has all of these mentioned capabilities. Stay away from heavy, unnatural looking filters. Always export and save your photos at original size. If you save any smaller, it will lose resolution and can appear pixilated. And when you’re happy with the result, update all of your files, and upload the photo to all your favorite social media channels.
DIY professional headshot reminders and tips
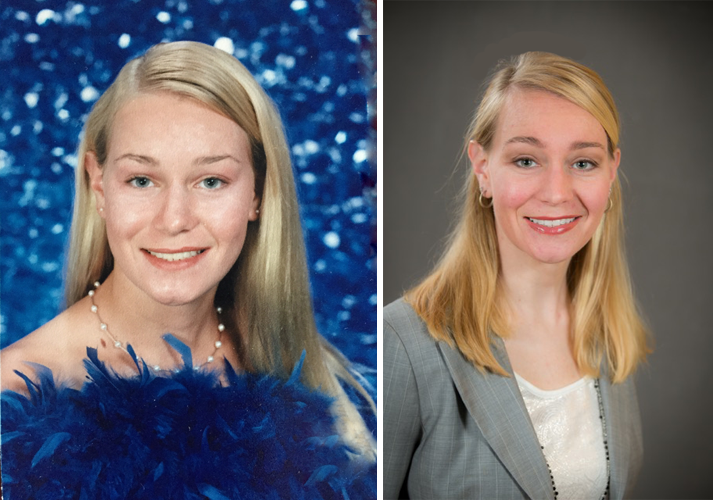
Your professional headshot is the image you use to portray yourself to the world, so make sure it’s true to you and represents you well. Ideally, professional headshots should be updated every one to two years, assuming your appearance doesn’t change much. If your hair drastically changes, your weight fluctuates, or your personal style evolves, this should be reflected in an updated DIY headshot.
Now that you know how to pull off a professional-looking headshot on your own, updating this as your look changes should be super easy to pull off.
Happy snapping!